Thursday, December 18, 2008

Toffee Chocolate Nut Wedges

Toffee Chocolate Nut Wedges

Toffee Chocolate Nut Wedges

Sometimes I feel like the holiday season is an unspoken competition. It can be a competition to give the best food gift, cook the best meal, or distribute the most cookies to the most people. When I go to a holiday party, I feel like it's a competition to make the most talked-about dish and go home with the least leftovers, without upstaging the hostess.

I know the holiday doesn't have to be competetive. Still, as a baker, there's nothing worse than to spend hours working on something elaborate and seasonal only to have no one eat it. Or have someone tell you they wanted to eat it, but they ate too many Candy Cane Joe-Joe's, or one too many pieces of Aunt So-and-So's super wonder fudge bark thing.

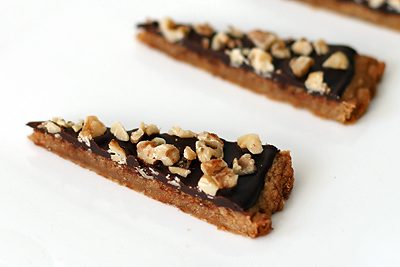
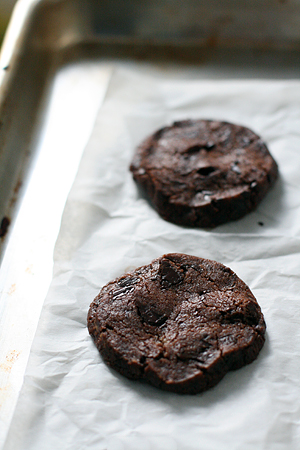
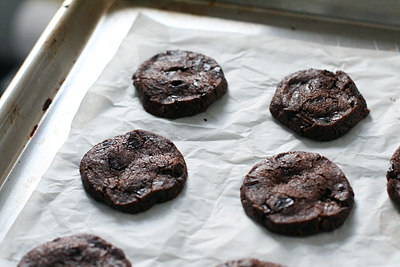
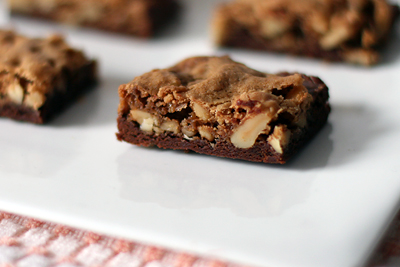
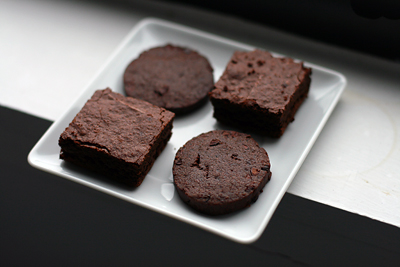
To cut back on holiday baking stress, it's good to have a repertoire of quick, impressive, cost-effective recipes. If you, like me, put off most of your holiday baking until the very last minute, you'll love this recipe for Toffee Chocolate Nut Wedges. With minimal effort, these delicious, elegant cookies can be baked and assembled in less than an hour.

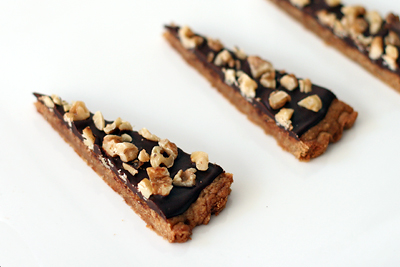
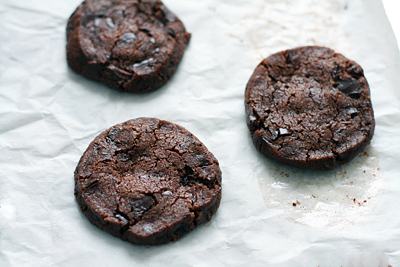
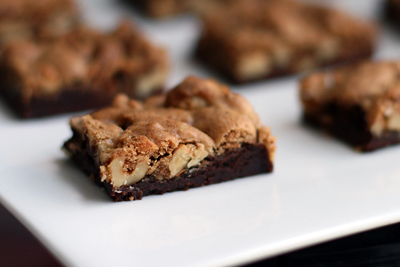
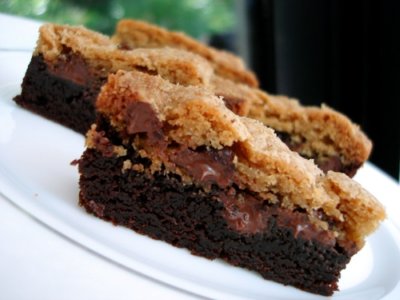
Rather than crunchy, like shortbread, these cookies are tender with crisped edges. The toasted nuts add a needed textural contrast to the cookie base and smooth, creamy ganache.

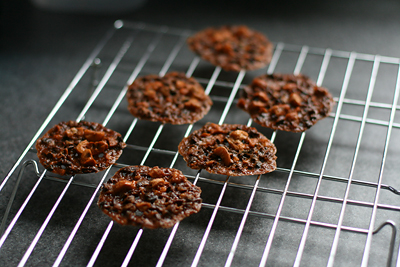
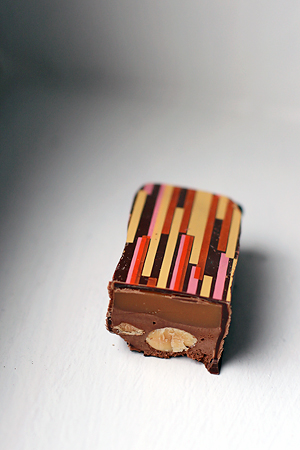
I think these cookies could be even more visually striking with different topping combinations. I had mendiants in mind when I thought of different ingredients to add: cocoa nibs, sea salt, pistachios, almonds, candied orange peel, dried tart cherries, cranberries, and raisins. Even white chocolate with candy cane pieces.

I don't think these cookies would go unnoticed at anyone's party! Even if they did...at least they keep well.

Toffee Chocolate Nut Wedges
adapted from Abigail Johnson Dodge's The Weekend Baker
8 tbsp unsalted butter, at room temperature
½ c dark brown sugar, firmly packed
¼ tsp table salt
1 yolk from large egg
½ tsp pure vanilla extract
1 c all-purpose flour
5 oz bittersweet or semisweet chocolate, chopped
3 tbsp heavy cream
½ c chopped pecans (or walnuts), toasted

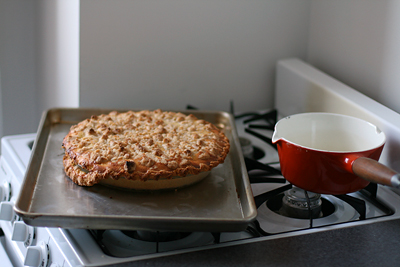
Position an oven rack in the middle and preheat to 350F. Lightly grease a 9.5" tart pan with a removable bottom. A pie plate or similarly sized baking pan will work, but you won't get the nice fluted edges.

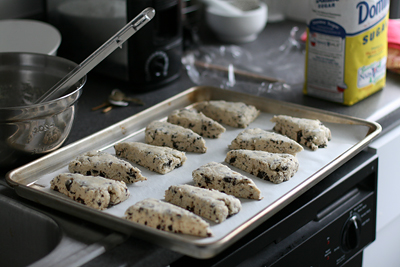
In a large bowl, combine the butter, dark brown sugar and salt. Beat with an electric mixer on medium speed until well blended. Add the egg yolk and vanilla and beat just until combined. Pour in the flour and beat on low speed until the dough begins to clump together. Scrape the dough into the prepared pan, scattering the pieces evenly. Pat the dough into the bottom (not up the sides) of the prepared pan to form an even layer. Bake until the top looks dry and the dough begins to pull away from the sides of the pan, about 25 to 27 minutes.

Meanwhile, melt the chocolate with the cream in a double boiler or in the microwave. Stir until smooth. When the crust is baked, transfer the pan to a rack. Pour the warm ganache over the warm crust and spread evenly to within 1/2” of the edge. Scatter the nuts over the ganache and gently press them into the chocolate. Let cool until the chocolate is set, about 4 hours at room temperature or about 2 hours in the refrigerator. Remove the outer ring of the tart pan and cut the “cookie tart” into 16 wedges. Serve the wedges chilled or at room temperature.


Thursday, December 11, 2008

Pumpkin Chocolate Chip Loaf

Pumpkin Chocolate Loaf

Pumpkin Chocolate Loaf

This is a recipe for Pumpkin Chocolate Chip Bread, but we like to call it Super Chocolate Awesome Bread. These were literally the first words out of my friend's mouth when he took a bite.

It's one of two recipes i've tried from Baked: New Frontiers in Baking- the second one being the Banana Espresso Chocolate Chip Muffins, which were also nicknamed Super Chocolate Awesome Muffins. The same friend had already devoured two before I'd had two bites. They were that good.

It's the simplicity of these two recipes that made me want to try them first. Both can be mixed up in practically no time, and they yield beautiful, moist cakes oozing with melting chocolate. The pumpkin bread is quite spicy; several people actually thought it was gingerbread. I'm tempted to try it without the chocolate, as i've been hurting for a good plain pumpkin bread recipe.

For the muffins, I bought already over-ripe bananas from Penn Mac. It's usually a good place to go if you don't want to wait for bananas to ripen. The espresso powder in the batter is a nice, dark complement to the chocolate. The coffee flavor was hard to identify in the final product- I thought it was nicely balanced. You can view a reprint of the recipe here, but the original uses only semisweet chocolate.

Not all of the recipes in this book appeal to me, but I liked these two so much that i'll probably try a few more!

Pumpkin Chocolate Chip Bread
adapted from Baked: New Frontiers in Baking
3 1/4 cups all purpose flour
2 tsp baking soda
2 tsp cinnamon
1/2 tsp nutmeg
1/2 tsp clove
1/2 tsp ginger
2 tsp salt
1 cup vegetable oil
1 3/4 cups pumpkin puree (15oz can)
3 cups granulated sugar
4 large eggs
1 tsp vanilla extract
2/3 cup water, room temperature
1 cup (12 oz) chocolate chips or chopped semisweet chocolate

Preheat the oven to 350F and position a rack in the middle. Grease and flour two 9x5 inch loaf pans or line them with foil or parchment paper.

In a large bowl, whisk together the flour, baking soda, spices, and salt. Set aside.

In another large bowl, whisk together the oil and pumpkin puree. Add the granulated sugar and whisk to combine. Add the eggs, one at a time, followed by the vanilla extract and water. Mix in the chocolate with a rubber spatula.

Fold the dry ingredients into the wet ingredients until just combined. Do not overmix (and don't worry if you see a few small streaks of flour). Divide into the two pans and bake for 1 hour and 15 minutes, or until a toothpick inserted in the center comes out clean. Transfer pans to a wire rack to cool for 10 minutes, then unmold leave to cool completely.

Sunday, November 23, 2008

David Lebovitz's Fresh Ginger Cake

Ginger Cake

Ginger Cake

Now that Thanksgiving is over and there's snow on the ground, I'm thinking less about pumpkin and more about cinnamon, nutmeg, ginger, cloves, allspice, peppermint, rum, cider, hot cocoa, candied citrus peels and nuts, and cranberries.

This simple, spicy cake that was once David Lebovitz's most requested recipe. It's very moist, and the flavor improves with age. My cake domed quite a bit and started to burn, so after it cooled I just sliced off the top and flipped the whole thing over. It made a nice breakfast for several days and I thought it was seasonally appropriate.

The cake was one of my last forays into Richard Sax's Classic Home Desserts (it's titled "East West Ginger Cake" in the book). I also tried the "Rich Soft Spice Cake" and "Hilda's Apple Cake"; both were good, but neither was my favorite from the book. As much as I've enjoyed it, I think it's time to return it to the library.

This recipe is available here.

Sables Korova (World Peace Cookies)

Sables Korova (Chocolate and Fleur de Sel)

Sables Korova (Chocolate and Fleur de Sel)

Sables Korova (Chocolate and Fleur de Sel)

In the world of food blogging, Pierre Herme's Sables Korova, renamed World Peace Cookies by Dorie Greenspan, are somewhat legendary. If you don't believe me, take a look through the google or flickr results.

Since so many people have described the addictive qualities of these indulgent, chocolate-studded, teasingly salty cookies, i'm going to spend more time talking about making them rather than eating them.

The nice thing about making a widely tried recipe is you can see the differences in others' results. I don't know about you, but I find photographic evidence of cookie diversity very comforting when a recipe doesn't turn out as expected.

I got a little impatient and baked a few cookies before the dough was thoroughly chilled. This batch yielded flat cookies that spread a little strangely. They looked a little like this. The photos above are from day two, when I sliced the well-chilled dough a little thicker.

In addition to temperature and size, ingredient distribution also effects these cookies. I'd suggest using very soft butter; cold butter doesn't incorporate as quickly, or as well. I had to mix my dough longer than i'd have liked, and my finished dough wasn't exactly homogenous. Foodbeam is a good blog for browsing photos and comments on sable technique.

Shaping the dough into logs takes a little practice too- I think this is a case where I would have liked to compress the logs in parchment paper, using the technique on page 185 of The Simple Art of Perfect Baking. I'll upend the dough onto some parchment, gently knead/shape it into a rough log, and then use the parchment and a straight-edged cookie sheet or dough scraper to shape it into a nicer circle.

You can view the recipe here. It's also been printed in Dorie Greenspan's Paris Sweets and Baking From my Home to Yours. The cookies were a hit at work, and I think they'd be an elegant addition to a holiday cookie box. You can freeze the logs ahead of time and bake them as needed.

Pecan Pie and Buttermilk Silk Pie

Pecan Pie

Buttermilk Silk Pie

Sometimes I get so curious about an unfamiliar recipe that I have to try it. Neither of these recipes appealed to me initially, but I was so pleased with the chunky pear pie that I decided to make the pecan and buttermilk silk pies from Classic Home Desserts.

Sax's Pecan Pie substitutes Golden Syrup and muscovado sugar for corn syrup and refined sugar. Dark rum adds a pleasant richness to the flavor. I can't say i'm a big fan of pecan pie, but this pie was certainly different from others i've had, and i'd make it again if someone requested it.

Buttermilk may seem like an odd ingredient for pie, but in this case it was perfect. The Buttermilk Silk Pie was creamy, sweet, and slightly tangy, with a fluffy texture reminiscent of a light cheesecake. I think a little berry compote would be lovely with this, or maybe a touch of lemon zest. Try not to overbake it or the custard will crack.

I left out an egg yolk, which wasn't a problem. The custard was a little loose on the very bottom (like a pudding cake), but it tasted good.

My trip to Manhattan was nice; my sister and I braved the Union Square Trader Joe's on Wednesday night and pulled off a Thanksgiving dinner in less than 48 hours (not without a little stress). While I thought i'd visit some old favorite places, I ended up trying mostly new ones. Some of my favorites:

  • Abraco Espresso (fantastic olive oil cake, and possibly the best cortado i've ever had). I also had coffee at Ninth Street Espresso and Joe the Art of Coffee. I preferred Abraco and Joe.

  • The Japanese style cheesecake at Amai was killer. I tried some muffins and tea cookies, but they weren't to my taste.

  • The pretzel croissant from City Bakery really is as good as David Lebovitz says...especially warm out of the oven. So wonderfully salty. The gingerbread men are good too.

  • Little Branch. Amazing cocktails and ambience.

  • Momofuku Noodle Bar. I could eat six of their pork buns in one go! We also had excellent kim chi stew, and romanesco cauliflower with boquerones.

  • The calamari tacos and posole from Barrio Chino were delicious. The tacos are very small, so plan to eat something additional if you're hungry.

  • Pumpkin scones from Alice's Tea Cup were huge, tender and coated with a perfectly burnt, sticky caramel. They made me want to brush all my baked goods with caramel.

    I went back to Chikalicious, which was excellent as always. I had an almond cake with persimmon brulee and vanilla milk sorbet. It was a mostly enjoyable trip and I'd love to go again. There was not enough time/room in my stomach to try Porchetta, and i'm itching to go back to Sfoglia.

    I hope everyone had a nice holiday. I am definitely going to eat a little more simply until Christmas.

    Pecan Pie
    adapted from Richard Sax's Classic Home Desserts
    1/2 quantity Basic Pie Dough
    1 cup raw cane dark muscovado sugar, turbinado sugar, or light brown sugar
    2/3 cup Lyle's Golden Syrup
    2 tbsp dark rum
    4 tbsp unsalted butter, softened
    3 large eggs
    1 tsp pure vanilla extract
    1/4 tsp table salt
    2 cups broken pecan meats

    1. Roll out the dough to 1/8 inch thickness and fit it into a 9in pie pan. Trim off excess dough, leaving about a 3/4in overhang. Fold under the edge of the dough, pressing along the rim and forming a high, fluted border. Chill until needed.

    2. In a large saucepan, combine the sugar, Golden Syrup, rum, and butter. Bring to a boil over medium heat. Boil for about 1 minute, stirring constantly. Remove pan from the heat and set aside to cool until lukewarm, at least 15 minutes. Preheat the oven to 350F with a rack in the lower third.

    3. In a small bowl, beat the eggs until creamy. Beat the eggs into the cooled syrup; stir in the vanilla, salt, and pecans. Pour filling into the pie shell.

    4. Bake until the filling is set but still slightly wobbly in the center, about 50 minutes. Cool the pie completely on a wire rack.

    5. Serve the pie at room temperature with whipped cream or vanilla ice cream.

    Buttermilk Silk Pie
    adapted from Richard Sax's Classic Home Desserts
    1/2 quantity Basic Pie Dough
    1 cup sugar
    3 tbsp corn starch
    1 large whole egg
    3 large egg yolks
    6 tbsp butter, melted
    1 1/2 cups buttermilk
    1 1/2 tsp pure vanilla extract
    1/4 tsp salt

    1. Roll out the dough to 1/8 inch thickness and fit it into a 9in pie pan. Trim off excess dough, leaving about a 3/4in overhang. Fold under the edge of the dough, pressing along the rim and forming a high, fluted border. Chill until needed. Preheat the oven to 350F with a rack in the lower third.

    2. Bake the pie shell, gently pricking any air bubbles with a fork until it is partially baked, 8-10 minutes (I would have left mine longer). Cool the pie shell on a wire rack, leave the oven on.

    3. Meanwhile, whisk together the sugar and corn starch until there are no lumps. Add the egg, egg yolks, melted butter, buttermilk, vanilla, and salt and mix well. Pour the filling into the partially baked crust.

    4. Bake until the surface is a very pale golden color and the custard is set but still slightly wobbly in the center, about 40 minutes. Do not overbake.

    5. Cool the pie to room temperature on a wire rack. Serve at room temperature, or slightly chilled.
  • Cranberry Nut Bread w/ Brown Butter Icing

    Cranberry Nut Bread with Brown Butter Icing

    I slathered this cranberry nut bread with a generous helping of burnt-butter icing. The rich, crackly glaze was a perfect foil for the tart berries and orange zest. I think the loaf would look exceptionally festive with some chopped sugared nuts on top.

    I think this is a great recipe for the holiday season. It's simple, and yields an attractive, portable, delicious product. I ended up making it twice this week; the first time, the bread was done a good twenty minutes before the baking time. The second time, I needed the full hour. I think I was a little haphazard with my flour and liquid measurements. Anyway, the wet mixture will incorporate better if you combine the butter and egg before adding the other ingredients.

    I'm off to Manhattan tomorrow to spend Thanksgiving with my sister. I'm planning to visit some of my old favorites (Payard, breakfast at Balthazar, Grom, maybe Cafe Sabarsky, City Bakery, or Lupa) and a few new places (Amai, Barrio Chino, Joe The Art of Coffee, Doughnut Plant). I love walking around aimlessly- I'll often walk over 100 blocks in one go!

    I did a ton of baking last week- i've worked my way through some cookie recipes and 5-6 recipes from Classic Home Desserts. I will share soon!

    Cranberry Nut Bread
    adapted from Cook's Illustrated
    1/3 cup orange juice
    grated zest from 1 large orange
    2/3 cup buttermilk
    6 tablespoons unsalted butter, melted and cooled slightly
    1 large egg, beaten lightly
    2 cups all-purpose flour
    1 cup granulated sugar
    1 teaspoon table salt
    1 teaspoon baking powder
    1/4 teaspoon baking soda
    1 1/2 cups cranberries, chopped coarse
    1/2 cup toasted pecans, chopped coarse

    Instructions
    1. Preheat the oven to 375 degrees. Grease bottom of 9 x 5-inch loaf pan, or line it with foil or parchment. Stir together orange juice, zest, buttermilk, butter, and egg in small bowl. Whisk together flour, sugar, salt, baking powder, and baking soda in large bowl. Stir liquid ingredients into dry with rubber spatula until just moistened. Gently stir in cranberries and pecans. Do not overmix.

    2. Scrape batter into loaf pan and spread with rubber spatula into corners of pan. Bake 20 minutes, then reduce heat to 350 degrees; continue to bake until golden brown and toothpick inserted in center of loaf comes out clean, about 45 minutes longer. Cool in pan 10 minutes, then transfer to wire rack and cool at least 1 hour before serving. If using icing, glaze the loaf while still warm and let harden at room temperature.

    Burnt Butter Icing
    2 tablespoons unsalted butter
    1 cup confectioners' sugar
    2 tbsp milk

    While the loaf is cooling, heat the butter in a small saucepan over medium heat, swiring the pan constantly, until the butter is golden brown, 3 to 5 minutes. Transfer the butter to a bowl and whisk in the confectioners' sugar and milk. Pour all of the icing over the cake and spread to cover.

    Wednesday, November 19, 2008

    Pittsburgh Eating 11/08

    Chocolate Caramel Nougat

    I'm starting to crave different things now that Pittsburgh's begun the brutal transition from fall to winter. In the baking department, I think about apples, pears, pumpkins, cranberries, toasted nuts, spices, holiday treats, and hot beverages.

    I've also noticed a change in what I want to eat outside the apartment. Last weekend I was excited to see Strip District stores stocking my favorite lebkuchen and Bahlsen cookies. I've enjoyed quite a few locally available items, and I thought i'd take a moment to mention a few:

    In Mon Aimee Chocolat, my friend Diane described this Caramel Chocolate Nougat (pictured above) as "the most decadent Mars bar you can imagine." It's too intense to eat in one sitting, but I loved the dark, rich nougat studded with almonds and pistachios.

    I made several sandwiches on the Parmesan Baguette from Allegro Hearth Bakery. It has great flavor and gets brilliantly golden and crusty when oiled and grilled. Allegro Hearth also has a really nice brioche, if you're looking to make decadent stuffing, french toast, bread pudding, or bostock.

    I don't usually tout restaurants, but I've eaten at Dinette three times already. I've tried a few of the pizzas: grilled eggplant with oil-cured olives, escarole with a sunny-up egg, fontina with fingerling potatoes and rosemary, and radicchio with pancetta. The fritto misto was delicious, as were the wines I tried. It's dangerously close by.

    I also had a pleasant lunch with a coworker at Baba D's in Oakland. I particularly love the Fool Madamas and the Sleek. The tahini in the Fool Madamas was sublime.

    I'd love to hear if you've tried an interesting Pittsburgh food product lately!

    Sunday, November 16, 2008

    Rhode Island Chunky Pear Pie

    Chunky Pear Pie

    Chunky Pear Pie

    My coworkers asked how I made this pie, and I said, "it's pretty simple."

    "It's just pears, walnuts and raisins...and some maple syrup. And some orange juice, zest, and cloves. And some tapioca, which I like to grind it in a coffee grinder so it dissolves faster."

    When asked about the crust, I said something like: "I make the crust entirely in the food processor. Except I like to pulse the butter and dry ingredients before I add the shortening because it incorporates faster. Sometimes I add the water and knead the dough by hand, smearing it against the counter...and yes there's an egg wash."

    I forgot to mention that I often roll the dough on a silpat, and i'll pop it in the freezer if it starts sticking. I core my pears with a mellon baller, and I use frozen shortening and toasted nuts (which I prefer to chop with a serrated knife).

    The recipe does look simple on the page, and I think that's a good thing. Too much detail can render a recipe inaccessible. When confronted with a giant text-block, some will assume the recipe is too complicated or time consuming. Thankfully, many cookbooks limit clutter on the page by including seperate sections on techniques and ingredients.

    Richard Sax's Classic Home Desserts does a beautiful job of organizing content. It has a good balance of historical and personal anecdotes, techniques, and recipes. It's a really nice multi-purpose baking book that's been extremely reliable so far. I'm really pleased with the variety and consistency of the recipes.

    I loved this pear pie. The filling is low on sugar and chunky, not gloopy.If you aren't keen on the orange/clove flavor combination- I think cinnamon and apple cider could be nice substitutions. This pie is great slightly warm, but it will slice best when fully cooled.

    Rhode Island Chunky Pear Pie
    adapted from Richard Sax's Classic Home Desserts

    Pie Dough
    2 1/2 cups all purpose flour
    2 tsp sugar
    3/4 tsp salt
    11 tbsp cold unsalted butter, cut into small pieces
    2 1/2 tbsp cold solid vegetable shortening
    5 tbsp cold water, plus more as needed

    1. Combine the flour, sugar, salt, butter, and shortening in a food processor or in a mixing bowl. Pulse the machine (or cut the ingredients together with two knives) until the mixture is crumbly.

    2. Add the water and pulse (or toss with a fork) until the mixture begins to clump together. Gather it into a ball, sprinkling with a few more drops of water, if needed. Divide the dough into two slightly unequal pieces and flatten into discs. Wrap in plastic, and chill for at least 30 minutes before rolling out.

    3. Preheat the oven to 425F, with a rack in the lower third. Roll out the larger piece of dough on a lightly floured surface to a large circle 1/8 inch thick. Fit it into a 9.5 inch pie pan. Trim the edge, leaving a 3/4in overhang. Roll out the remaining dough and transfer it to a foil lined baking sheet (or a silicone mat). Chill the doughs while you prepare the filling.

    Pear Filling
    4 pounds (about 12) ripe pears (preferably Bosc or Anjou)
    2 1/2 tbsp orange liqueur, orange juice, or amaretto
    2 1/2 tbsp maple syrup
    2 tsp grated orange zest
    1/2 tsp ground cloves
    2/3 cup walnut pieces
    1/3 cup golden raisins
    2 tbsp quick cooking tapioca
    2 tbsp cold unsalted butter, cut into pieces
    1 egg yolk mixed with 1 tbsp water, for egg wash

    1. Peel, halve, and core the pears; cut into coarse chunks, letting the pieces fall into a large bowl. You should have about 6 cups (*I had -way- more. I only needed about 8-9 pears). Add the orange juice (or liqueur), maple syrup, orange zest, cloves, walnuts, raisins, and tapioca. Toss gently to combine the ingredients. Place the filling in the pie shell, mounding it in the center. Dot with the butter.

    2. Brush the edges of the pie crust with egg wash. Loosely drape the remaining dough over the filling. Trim off the excess pastry, leaving a 3/4in border. Turn the edges of the top crust under the edges of the bottom crust, leaving a smooth border on the rim of the pie pan. Crimp or flute the border. Brush the top of the pie with the egg wash. Make several slashes in the top of the dough.

    3. Place the pie on a baking sheet (*I put the sheet in the oven ahead of time). Bake until the crust is golden brown and the juices begin to bubble up, about 50 minutes.

    4. Cool the pie on a wire rack. Serve lukewarm or at room temperature.

    Pear and Walnut Muffins and Coffee Cake

    I had mixed success with last week's baking.

    Pear Walnut Muffins

    Pear Walnut Muffins

    This recipe for pear and walnut muffins was a hit at work, but i'm not sure i'll make it again. It was more complicated than most quickbread recipes. While whipping cream, separating eggs, and toasting walnuts, I couldn't help thinking that I like muffins to be a quick and not-too-messy project.

    The muffins were rather rich for breakfast, but they'd be nice for tea. The tender white cakes are studded with crunchy walnuts and big chunks of canned pear. Whipped cream, orange zest, and ginger give them a delicate flavor.

    Coffee Cake

    Coffee Cake

    I also tried the cinnamon swirl buttermilk pound cake from Tish Boyle's The Cake Book, which ripped horribly during unmolding (though I greased and floured the pan). It's not the first time i've had trouble unmolding filled coffee cakes. I'm not sure if I need to allow more cooling time or invest in a non-stick pan. It was also well received, but I found the texture tough and the flavor plain.

    This week i'm trying a Rhode Island chunky pear pie and some cookies. I have high hopes for them! I'm hoping I have time to go through some of my Paris photos too. That project has been on the back burner for too long.

    Monday, November 10, 2008

    Quiche Lorraine

    Quiche Lorraine

    Quiche Lorraine

    Here's a fairly simple Quiche Lorraine from Tarts: Sweet and Savory. I'd recommend using your favorite basic shortcrust recipe; the one in the book is fine, but it's a little difficult to make by hand. I also returned the book to the library, so I don't have the recipe (sorry!).

    While I enjoyed this, I prefer a thicker quiche. I'd love to be able to emulate the thick, just-cooked spinach and mushroom quiche from Jin Patisserie, or the sage, roasted squash, bacon, and asiago quiche I had a few weeks ago. Sometimes I have trouble getting the crust to cook through without overcooking the filling, and I still haven't found a really consistent crust to use.

    I'm getting plenty of crust rolling and shaping practice from these pies and tarts. I tried the Butternut Squash Pie again last night using a crust recipe from Classic Home Desserts by Richard Sax. The crust turned out well, but I undercooked the butternut squash and ended up with a denser, weaker flavored filling than usual. I think i'll get it right next time.

    Quiche Lorraine
    adapted from Maxine Clark's Tarts: Sweet and Savory

    1 blind-baked 9 inch shortcrust
    8 oz bacon, chopped, or cubed prosciutto
    5 large eggs
    3/4 cup heavy cream or creme fraiche
    freshly grated nutmeg, to taste
    1/2 cup grated Gruyere cheese, about 2oz
    sea salt and freshly ground black pepper

    Heat a nonstick skillet and saute the bacon or prosciutto until brown and crisp, then drain on paper towels. Sprinkle over the base of the pie crust.

    Put the eggs and cream or creme fraiche into a bowl, beat well, and season with salt, pepper, and nutmeg to taste. Carefully pour the mixture over the bacon and sprinkle with the Gruyere.

    Bake for about 25 minutes until just set, golden brown, and puffy. Serve warm or at room temperature.

    Sunday, November 9, 2008

    Pumpkin Muffins x 2

    Pumpkin Muffins

    What autumn would be complete without pumpkin muffins? Certainly not a typical autumn in Pittsburgh, when bakeries, street vendors, workplaces, and Starbuckses are brimming with pumpkin pies, cakes, breads, rolls, scones, and lattes.

    Pumpkin desserts seem tied to thoughts of limited availability. They also seem to incite seasonal compulsion; last week I overheard several people saying they were hopelessly addicted to the glazed pumpkin cookies at Eat Unique. I've also seen people chase a venti pumpkin spice latte with a pumpkin cream cheese muffin.

    I'm not saying this is a bad thing, or that i'm immune. I quite enjoyed Dozen Bakeshop's baked french toast with pumpkin/cream cheese custard today, and I have plans to try some more pumpkin pie recipes. I do wonder how this phenomenon evolved, and whether it significantly impacts food sales.

    As much as I enjoy pumpkin, I haven't found a favorite pumpkin muffin recipe. Before my trip to Paris, I tried two different recipes: one from Belinda Jeffery's Mix and Bake and one from Dorie Greenspan's Baking From my Home to Yours.

    I can't say which I liked better, since they were completely different. Jeffery's recipe (pictured in the front) has a rich, cake-like texture, a strong nutmeg flavor, and a delicious cinnamon sugar and walnut topping. Greenspan's recipe is simpler with a more balanced spice blend, but the resulting muffins reminded me more of biscuits than cakes. They'd be good spread with butter or jam.

    I will print both below and leave you to decide which you prefer. I'm also planning to try the recipe from Sara Foster's Fresh Every Day. I'd love to know if any of you have recipe recommendations.

    Spicy Pumpkin, Pecan, and Maple Muffins
    adapted from Belinda Jeffery's Mix and Bake
    1 cup pumpkin or butternut squash pulp
    1 cup (150g) all purpose flour
    1/2 cup whole wheat flour (80g) (I added extra all purpose)
    1 tsp baking soda
    3/4 tsp salt
    1/2 tsp baking powder
    1 tsp nutmeg
    1 1/2 tsp cinnamon
    120g toasted pecans or walnuts
    120g raisins or dried cranberries
    2 eggs
    1/2 cup (110g) brown sugar
    1/2 cup maple syrup
    1/2 cup light olive oil (I used melted butter)
    1 1/2 tsp vanilla extract
    1/2 cup buttermilk

    Topping
    1/4 cup (55g) sugar
    1/4 cup (40g) chopped pecans or walnuts
    1 1/2 tsp ground cinnamon

    1. Preheat your oven to 200C/350F. Grease a 12 cup muffin tin, or line the cups with paper liners.

    2. Combine the flours, baking soda, salt, baking powder, nutmeg, and cinnamon in a large bowl and whisk them to combine. Add the nuts and raisins and toss them about to coat in the flour mixture. Set aside.

    3. Lightly whisk the eggs in another bowl, then add the remaining ingredients and the cup of mashed pumpkin. Whisk them together until thoroughly mixed.

    4. Make a well in the middle of the dry ingredients and pour in the pumpkin mixture. Stir them together until just combined; the mixture will be quite loose and sloppy so let them sit for 1 minute to thicken up. Divide the batter among the muffin holes, filling them to the top.

    5. For the topping, stir all the ingredients together. Sprinkle the topping mixture thickly over each muffin.

    6. Bake for 25-30 minutes, or until a skewer inserted in the center of a muffin comes out clean. Cool muffins in the tin on a wire rack for a few minutes, then turn them out onto the rack to cool completely. Serve warm or at room temperature.

    Pumpkin Muffins from Dorie Greenspan

    Tuesday, November 4, 2008

    Cinnamon Buns

    Cinnamon Rolls

    Cinnamon Rolls

    I'm still working on a post about my trip. For now, I thought i'd share some of the baking I did beforehand.

    I'd been meaning to try this recipe for a while, and i'm really pleased I did. Most of the cinnamon bun recipes i've tried yield rich, danish-like pastries as opposed to fluffy, bread-like ones. The relatively low fat content of the dough makes these buns ideal for topping with sugary glaze or creamy frosting.

    I used whole milk, all purpose flour, and lemon extract for the dough. I think bread flour would have been better, and i'm eager to try the buttermilk variation. I encourage you to be very cautious with the lemon extract. The Nielsen-Massey brand is incredibly potent, and I wish i'd cut the amount in half. Most of my friends liked the lemon flavor, but I think I would have preferred vanilla.

    I haven't included the fondant glaze from the original recipe; it was a pretty standard combination of confectioners' sugar, warm milk, and lemon extract. Instead, i've added a cream cheese frosting recipe from another blog. These buns are texturally similar to the ones sold at Dozen Bakeshop in Lawrenceville, so if you're a fan i'd try out the recipe.

    There's nothing quite like biting into a huge, freshly-baked cinnamon roll. I spent a leisurely afternoon proofing, shaping, and baking the dough, and then end product was incredibly satisfying.

    Cinnamon Buns
    From Peter Reinhart’s The Bread Baker’s Apprentice
    Makes 8-12 large or 12-16 smaller buns

    6 1/2 tablespoons (3.25 ounces) granulated sugar
    1 teaspoon salt
    5 1/2 tablespoons (2.75 ounces) shortening or unsalted butter, room temperature
    1 large egg, slightly beaten
    1 teaspoon lemon extract or zest
    3 1/2 cups (16 ounces) unbleached bread or all-purpose flour
    2 teaspoons (.22 ounce) instant yeast
    1 1/8 to 1 1/4 cups (9 to 10 ounces) whole milk or buttermilk, room temperature
    1/2 cup (4 ounces) cinnamon sugar (6 1/2 tablespoon granulated sugar plus 1 1/2 tablespoons cinnamon

    1. Cream together the sugar, salt, and shortening on medium-high speed in an electric mixer with a paddle attachment. Whip in the egg and lemon extract until smooth. Then add the flour, yeast, and milk. Mix on low speed until the dough forms a ball. Switch to the dough hook and increase the speed to medium, mixing for approximately 10 minutes, or until the dough is silky and supple, tacky but not sticky. Lightly oil a large bowl and transfer the dough to the bowl, rolling it around to cover it with oil. Cover bowl with plastic wrap.

    2. Ferment at room temperature for approximately 2 hours, or until the dough doubles in size.

    3. Mist the counter with spray oil and transfer the dough to the counter. Roll out the dough with a rolling pin, lightly dusting the top of the dough with flour. Roll it into a rectangle about 2/3 inch thick and 14 inches wide by 12 inches long for larger buns, or 18 inches wide by 9 inches long for smaller buns. Sprinkle the cinnamon sugar over the surface of the dough and roll the dough up into a cigar-shaped log, creating a spiral as you roll. With the seam side down, cut the dough into 8 to 12 even pieces, each about 1 3/4 inches thick for larger buns; or 12 to 16 pieces each 1 1/4 inch thick for smaller buns.

    4. Line 1 or more sheet pans with baking parchment. Place the buns approximately 1/2 inch apart so that they aren’t touching but are close to one another.

    5. Proof at room temperature for 75 to 90 minutes, or until the pieces have grown into one another and have nearly doubled in size. You may also retard the shaped buns in the refrigerator for up to 2 days, pulling the pans out of the refrigerator 3 to 4 hours before baking to allow the dough to proof.

    6. Preheat the oven to 350 degrees F with the oven rack on the middle shelf.

    7. Bake the buns for 20 to 30 minutes, or until golden brown.

    8. Cool the buns in the pan for about 10 minutes and then glaze the tops. Remove the buns from the pans and place them on a cooling rack. Wait at least 20 minutes before serving.

    Cinnamon Bun Glaze
    From Molly Wizenberg, Bon Appétit, March 2008

    4 ounces cream cheese, room temperature
    1 cup powdered sugar
    1/4 cup (1/2 stick) unsalted butter, room temperature
    1/2 teaspoon vanilla extract

    Combine cream cheese, powdered sugar, butter, and vanilla in medium bowl. Using electric mixer, beat until smooth. Spread glaze on rolls. Serve warm or at room temperature.

    Monday, November 3, 2008

    Back from Paris.

    I am back from Paris. New posts are imminent!

    -Lisa

    Saturday, October 25, 2008

    Updated Pittsburgh Eatery Map


    View Larger Map

    I've edited my "Places to Eat and Buy Food in Pittsburgh" map. I've added some new places I like and removed some places that closed or changed hands. Remember, this list is personal, not comprehensive.

    I leave for Paris tomorrow! We have tons of plans. Here are a few definite ones: We're having lunch at Le Jules Verne and dinners at Le Violon D'Ingres and L'Entredgeu (among other places). We're going to the Salon du Chocolat. We're going to some markets, cookware and serveware stores, and cookbook stores. We're going to Poilane, Pierre Herme, Sadaharu Aoki, Berthillon, Eric Kayser, and however many bakeries/chocolate stores I can cram in.

    I'm planning to spend a good chunk of time just walking around. It's supposed to rain, but I don't really mind.

    I've behind in the blogging- I have some funny stories about making restaurant reservations in French, and pictures of quiche lorraine, Peter Reinhart's cinnamon rolls, and two kinds of pumpkin muffins.

    I will try and take plenty of pictures. See you when i'm back from Paris.

    Tuesday, October 21, 2008

    Sour Cream Fudge Cake w/ Peanut Butter Frosting

    Chocolate Cake w/ Peanut Butter Frosting

    Chocolate Cake w/ Peanut Butter Frosting

    What makes a good birthday cake?

    When I was a kid, I didn’t want a fancy, elaborate layer cake. I wanted a cake with Gumby on it. I wanted my mother to make the same lemon and german chocolate cake recipes over and over again. I ogled grocery store cakes adorned with neon-colored sugar roses and ballerinas, and I obsessed over a Cinderella cake complete with tired looking buttercream pumpkins and delicate figurines.

    The mid-twenties birthday lacks the magic of a childhood birthday. In fact, if you live alone and far from home, birthdays can seem quite selfish. Casual mention your own birthday at work or in public can be misinterpreted as a scheme for free food, swag, and personal validation. Consequently, you get in the habit of either hiding your birth date, or telling anyone who will listen that you want NO gifts, NO parties, and certainly NO cake.

    I rarely get cake these days. I’ve had my share of practically non-existent birthdays- the sort of birthday where you’re too busy reheating leftovers and rushing out the door for a five hour rehearsal to think about cakes and singing.

    A good birthday cake doesn’t have to look or taste good (though it’s certainly a bonus if it does). In my opinion, birthday cake success is dependent on how, where, when, and with whom the cake is eaten. I asked a number of my friends to recall their favorite birthday cakes, and most of them said the majority of their cakes had been "average." So what makes an average cake spectacular?

    My friend Anusha said: I like when it's something that is special for me...I love oreos, so an oreo anything cake is AWESOME. I also like when there's some deep tradition in it-like we got the same cake for YEARS for my sister's birthday."

    My friend Peter said while he was on the Atkins Diet, his wife made him a cake out of frozen blueberries and cream. It wasn't exactly a cake, but it was "so completely insane" that he loved it.

    One of my best friends turned 25 last week, and since he is worth celebrating I made him a cake. I picked out this Sour Cream Fudge Cake with Peanut Butter frosting from The Cake Book because it looked simple and good. We lit candles, sang, and ate huge, sprinkle-topped slices from the pan. The frosting consistency was a little strange, but nobody noticed.

    For me, a good cake should rekindle memories of candles, singing, tradition, family, friends, and childhood wishes. It should reflect its recipient, and be given with the best intentions. I’ll turn a blind eye to stray eggshells, neon-colored frosting, or lopsided layers if a friend takes the time to make me a cake.

    Sour Cream Fudge Cake
    adapted from Tish Boyle's The Cake Book
    2 1/4 cups cake flour
    1 1/2 tsp baking soda
    1/2 tsp salt
    3 oz unsweetened chocolate, chopped
    1 1/2 sticks unsalted butter, softened
    2 1/4 cups granulated sugar
    3 large eggs
    2 tsp vanilla extract
    3/4 cup sour cream
    3/4 cup hot water

    1. Position a rack in the center of the oven and preheat to 325F. Grease the bottom and sides of a 9x13 pan and dust with flour, tapping out the excess.

    2. Sift together the cake flour, baking soda, and salt into a medium bowl. Whisk to combine.

    3. Put the chocolate in a medium stainless steel bowl and place over a pot of barely simmering water. Heat, stirring frequently, until the chocolate is completely melted. Remove the bowl from the pot and set aside to cool until tepid.

    4. In the bowl of an electric mixer fitted with the paddle attachment, beat the butter and sugar at medium high speed until well blended and light. At medium speed, add the eggs one at a time, beating well after each addition and scraping down the sides of the bowl as necessary. Beat in the vanilla extract until blended. Add the chocolate in two additions, mixing until blended. At low speed, add the flour mixture in three additions, alternating it with the sour cream in 2 additions and mixing until blended. Add the hot water 1/3 at a time, mixing until blended. Remove the bowl from the mixer and, using a rubber spatula, stir the batter a few times to ensure it is blended. Scrape the batter into the prepared pan.

    5. Bake the cake for 45-55 minutes, until a toothpick inserted in the center comes out clean. Cool the cake completely in the pan on a wire rack.

    6. Frost the top of the cake with peanut butter frosting. Serve the cake from the pan, cutting it into squares and sprinkling with sugared peanuts (or chocolate sprinkles). Store covered in the refrigerator for up to 5 days.

    Creamy Peanut Butter Frosting
    3/4 cup creamy peanut butter (not natural or low sugar.)
    4 tbsp unsalted butter, softened
    1 1/2 tsp vanilla extract
    3 cups confectioners' sugar
    1/3 cup whole milk

    1. In an electric mixer fitted with the paddle attachment, beat the peanut butter and butter at medium speed until well blended and smooth, scraping down the bowl as necessary. Add the vanilla and mix until blended. At low speed, gradually add the confectioners' sugar in 3 additions, alternating it with the milk in 2 additions. Beat at low speed until creamy, about 1 minute.

    2. Use immediately, or cover and refrigerate.

    Wednesday, October 15, 2008

    Buttermilk Pumpkin Pie

    Buttermilk Pumpkin Pie

    Buttermilk Pumpkin Pie

    I tried another pie recipe from The Modern Baker. It calls for chopped pecans, which I omitted for budgetary reasons. The crust was something of a disaster; I made two batches and the first was too wet to work with. Next time i'll be more watchful when adding the egg/water mixture.

    This pie is relatively light- it uses 6 tbsp of butter in the crust as opposed to 9-16 (and I never use the whole batch) and buttermilk instead of cream or condensed/evaporated milk.

    The recipe was for a 10 or 11 inch tart (I can't remember), but I only had a 9.5 inch tart pan. Luckily, the pan was large enough to accommodate the filling.

    The pie was pretty good, but I prefer the Butternut Squash Pie I made earlier in the month.

    With all the work and vacation planning, I've been a little behind in blogging. Rest assured that i'll give you more recipes soon!

    Monday, October 13, 2008

    Spiced Apple and Sour Cream Muffins

    Spiced Apple and Sour Cream Muffins

    These muffins from Kate Zuckerman's The Sweet Life did not last two hours at work. I almost wish i'd saved an extra one for myself. The recipe says to divide the batter evenly among 12 molds, but the batter yielded enough for 14-16. Kate has also made a note of this on her website.

    The muffins were tender, nicely-spiced, and studded with moist chunks of sauteed golden delicious apples. The apples I picked up at the Oakland Farmer's Market were fantastic and held their shape well.

    I'm trying to ease up on the baking before my trip. Paris in less than two weeks! Here's a map of places/eateries that piqued my interest. I have pages and pages of suggestions from friends/guidebooks/blogs, and i'm trying to narrow them down. I'll be leaving in plenty of unscheduled time too. When I vacation, my favorite thing to do is just walk around and look at things.


    View Larger Map

    Tuesday, October 7, 2008

    Sour Cream-Apple Pie

    Sour Cream Apple Pie

    Sour Cream Apple Pie

    With some teeth-gnashing and trepidation, I've been trying the Carnegie Library's copy of Nick Malgieri's The Modern Baker. This new cookbook focuses on time saving tools and techniques geared towards busy home bakers. Malgieri is an accomplished chef and cookbook author, so I had really high hopes for his latest (given its conceptual similarity to The Weekend Baker).

    I've had trouble with some of the recipes, and i'm not sure why. It could be my oven, my technique, or my interpretation of the directions. It could be the writing, the layout, or the original test conditions. It could be the weather. Anyway, here are some of my notes:

    The small typeface is hard to read. Granted, I prop my cookbook a few feet away and glance at it periodically, but this is the first time i've misread measurements while cooking.

    So far, i've only tried the Raisin Spice Squares, the Irish Soda Muffins, and the Sour Cream-Apple Pie. The raisin squares needed extra baking time, and they weren't to my taste. They had a brownie-like texture, which was distracting given that they don't have chocolate in them. I found the raisin and molasses flavor overwhelming.

    The Irish Soda Muffins were quick to assemble, but plain-tasting (I omitted the optional caraway). They'd be nice spread with jam, since they're not too sweet.

    The Apple-Sour Cream Pie was phenomenal, despite some technical difficulties. My crust drooped over the edge of the pan on one side, and the streusel sank deep into the custard (which overflowed slightly). The bottom didn't brown as well as I would have liked, probably because it was frozen when I assembled the pie.

    Luckily, the finished pie sliced perfectly and everyone loved it. The crust was really interesting- the edges were crunchy, but the bottom was spongy and cake-like. It was a nice complement to the apples and sour cream custard.

    I am very curious to hear if any of you have tried recipes from the book and whether or not you've had success. I'm going to try a few more- i'll let you know how it goes. I'm reminded of the experience I had with the Tartine cookbook, where no recipe I tried turned out the way it was supposed to...

    I'm going try some more recipes, probably pies for now since the first one was encouraging. This blogger had some positive experiences with the cakes, and has posted some photos.

    Monday, October 6, 2008

    Butternut Squash Pie

    Butternut Squash Pie

    Butternut Squash Pie Filling

    This weekend, I decided to try David Lebovitz's recipe for Butternut Squash Pie. I bought a large butternut squash in the Strip District and defrosted a big chunk of leftover tart dough.

    I really love the Rich Shortcrust Pastry Dough from this post. Even when rolled very thin, it stays flaky, delicate, and crisp. The base recipe is intended for savory tarts, but you can add 2 tbsp confectioners' sugar for sweet ones.

    My tart shells were quite shallow; I ended up with enough filling for one 9-inch tart, three 4-inch tarts, and six 4oz ramekins (the original recipe is for one 10-inch pie). I baked the ramekins in a water bath until they were mostly set but slightly wobbly in the middle. They turned out well, though they'd be better with some whipped cream, ice cream, streusel, or sugared nuts sprinkled on top.

    I'm not sure I prefer butternut squash pie to pumpkin pie, but it's certainly delicious and fall-appropriate. Like Lebovitz, I prefer this pie chilled (but i've always had an affinity for cold pumpkin pie).

    Fall is my favorite season, and i've definitely caught the fall baking bug. You'll be seeing an assortment of apple and pumpkin desserts very soon...

    Butternut Squash Pie
    adapted from David Lebovitz's Room for Dessert
    makes one 10-inch pie

    2 pounds butternut squash (for about 2 cups pulp)
    1 cup heavy cream
    1/2 cup milk
    4 eggs
    3/4 cup light brown sugar, firmly packed
    1 tsp ground ginger
    1 tsp ground cinnamon
    1/4 tsp ground cloves
    1/4 tsp ground black pepper
    1/4 tsp grated nutmeg
    pinch of salt
    1/2 tsp vanilla extrct
    1 tbsp brandy
    one 10-inch prebaked pie crust

    1. Position the oven rack in the center of the oven and preheat to 400F. Line a baking sheet with parchment and rub generously with butter.

    2. Slice the squash in half lengthwise. With a spoon, remove the seeds and fibers from the cavity. Place the halves cut side down on the baking sheet and bake for 45 minutes, until tender and fully cooked.

    3. While the squash is baking, mix together the cream, milk, eggs, sugar, spices, salt, vanilla, and brandy.

    4. When the squash is cooked, remove it from the oven and turn the oven down to 375F. Scoop out the squash pulp and add to the other ingredients. Mix until smooth in a food processor or blender.

    5. Pour the warm filling into the pre-baked pie shell and bake for 30-35 minutes, until just barely set in the center. (I poured the filling through a strainer).

    Tuesday, September 30, 2008

    Whoopie Pies

    Whoopie Pies

    Whoopie Pies

    I think whoopie pies are rather whimsical. There's something about the fluffy marshmallow filling and bendy, cakelike cookies that makes me wish I liked eating them more than I do. Generally, I make whoopie pies because they elicit ecstatic reactions from other people. Especially if you coat them in sprinkles.

    This recipe isn't difficult, but you can get wildly different results if you're not careful with ingredient temperatures. The cookie dough and filling are easiest to make when the butter is quite soft. I think room temperature buttermilk would be optimal as well. Cold butter will make the filling lumpy and the cookies less uniformly shaped.

    Three-bite Whoopie Pies
    adapted from Abigail Johnson Dodge's The Weekend Baker

    For the chocolate wafers:
    2 cups (255g) all purpose flour
    2/3 cup (57g) unsweetened natural cocoa powder, sifted
    1/2 tsp baking soda
    1/2 tsp table salt
    12 tbsp (170g) unsalted butter, at room temperature
    1 1/2 cups (340g) granulated sugar
    1 tsp pure vanilla extract
    1 cup buttermilk

    For the vanilla filling:
    12 tbsp (170g) unsalted butter
    1 1/3 cups (177g) marshmallow fluff (not creme)
    3/4 cup (85g) confectioners' sugar
    2 oz (57g) cream cheese, at room temperature
    1 1/2 tsp pure vanilla etract
    1/4 tsp table salt

    1. To make the chocolate wafers, position an oven rack on the middle rung. Preheat the oven to 375F/190C. Line 3 cookie sheets with parchment paper.

    2. In a medium bowl, combine the flour, cocoa, baking soda, and salt. Whisk until well blended. In a large bowl, combine the butter, sugar, and vanilla. Beat with an electric mixer on medium high speed until well blended. Pour in about 2/3 of the dry ingredients and mix on low speed just until blended. The mixture will look sandy, with small pebbles of dough. Add the buttermilk and continue mixing just until blended. Pour in the remaining flour mixture and mix just until blended.

    3. Using a small scoop or 2 tbsp, drop 2 tbsp mounds of dough onto the prepared cookie sheets, spacing them about 2 inches apart. Bake one sheet at a time until the mounds are puffed and a toothpick inserted in the center comes out clean, about 11 minutes. Transfer the cookie sheet to a rack and let cool for 5 minutes. Using a spatula, lift the cookies from the sheet onto a rack and let cool completely.

    4. Prepare the filling while the chocolate wafers are baking. Combine the butter, marshmallow, confectioners' sugar, cream cheese, vanilla, and salt in a medium bowl. Beat with an electric mixer fitted with the whisk attachment on medium speed until well blended and smooth.

    5. Cover the bowl with plastic wrap and set the filling aside until the chocolate wafers are ready to be assembled. If the filling is very soft, refrigerate it, stirring frequently, until it's firm enough to hold its shape.

    6. To assemble the pies, arrange half of the cooled wafers, flat side up, on a work surface. Mound about 1.5 tbsp of the filling in the center of each. Top with the remaining wafers and press gently on top until the filling spreads just to the edges. Refrigerate until the filling is firm, about 1 hour, or until ready to serve. The assembled pies will keep in the fridge for a week, or in the freezer for 3 months.

    Sunday, September 28, 2008

    David Lebovitz's Chocolate Chip Cookies

    Chocolate Chip Cookies


    Chocolate Chip Cookies

    When I saw this photo, I knew I had to make these cookies. I did a quick Google search for "David Lebovitz's Chocolate Chip Cookies" and found the recipe on Heidi Swanson's blog. It's originally from Lebovitz's The Great Book of Chocolate.

    I really like this recipe; it has a good ratio of nuts and chocolate to dough. I took care to use good quality semisweet chocolate and toast the heck out of the walnuts, and I found that the cookies can have a variety of different textures depending on how you bake them.

    I shaped half of the dough with a tablespoon scoop. I rolled the remaining dough into a log, chilled it thoroughly, and sliced it into rounds. I think I prefer the slice-and-bake method; the finished cookies were visually striking and crispy. The scooped cookies were substantial, chunky, and a little softer in the middle. Baking time will also affect the texture.

    I'm going to make these again with pecans instead of walnuts. I really couldn't be happier with how they turned out!

    Tuesday, September 23, 2008

    Crepes with Nutella

    Making Crepes

    Crepes with Nutella

    I can never make sense of crepe-making instructions. They say things like "pour the batter into the pan, rotating the pan so a thin layer coats the entire bottom." If you've never made a crepe, it can be hard to picture this process. You might try and execute it, only to find that your pan is too hot, your batter is the wrong consistency, and you haven't poured enough to coat the whole pan.

    I also notice that people tend to be very opinionated about crepes. In your effort to learn more, you might ask a friend for advice. They might insist that you buy an expensive, "authentic" crepe pan or (heaven forbid) one of these. They will probably have a strong opinion on how long to cook the crepe, and how brown it should be (if at all).

    I think crepe technique is best observed and practiced, not read. Try a few batter recipes until you find one you like and can execute it consistently. I'm partial to David Lebovitz's Buckwheat Crepes. I cook them in a flimsy skillet that cost less than $10, using technical cues from Jacques Pepin and my old catering boss. Since i'm usually cooking for one, I like to make all of the crepes and store them in the freezer for later filling/reheating.

    This is one of those moments i'd love to be able to make a video.

    How do you cook your crepes?

    Sunday, September 21, 2008

    The Week in Review

    Butternut Squash

    1) I went to the Strip District and bought some vegetables, including a squash that I roasted with garlic, olive oil, sage, salt, and pepper. I also bought a delicious sesame-semolina baguette from Mediterra.

    Espresso Swirl Brownies

    2) I made the Espresso Swirl Brownies from Alice Medrich's Cookies and Brownies. Do not ignore the step that says to chill them for at least two hours. At room temperature they were a squishy, under-baked mess. Assuming they were ruined, I threw all but one into the garbage. The next morning, the chilled brownie was perfectly edible. That's what I get for trying to bake brownies when I have to rush out the door. They could've used 5-10 more minutes in the oven.

    3) I booked tickets to Paris. My aunt and I are going October 26-November 2. Our itinerary is pretty flexible, but i'm pretty sure we'll be visiting the Salon du Chocolat.

    I've been digging through books and websites trying to figure out all the places I want to visit/eat! Poilâne, Sadaharu Aoki, Pierre Herme, DOT (vintage kitchenware), Eric Kayser, Du Pain et des Idees, Grom, John-Charles Rochoux, Blé Sucré, pretty much anywhere mentioned on David Lebovitz and Dorie Greenspan's blogs.

    In addition to planning, I will also be running and saving money like crazy...

    Friday, September 19, 2008

    Black Bottom Walnut Praline Bars

    Black Bottom Praline Bars

    Black Bottom Praline Bars

    These bars were a big hit at work. They remind me of Abigail Johnson Dodge's Chocolate Chip Brownie Double Deckers from The Weekend Baker, but they're a little more sophisticated. The chocolate layer is richer, and the topping has a stronger butterscotch taste. I used toasted walnuts, but I think I would have preferred pecans.

    This is the best brownie variation i've tried in a while. Cook's Illustrated's Triple Chocolate Espresso Brownies were a close second. I like Alice Medrich and Emily Luchetti's brownies well enough, but I still haven't found a recipe I can call my favorite. I can never get the exact texture and flavor i'm looking for.

    You can use any half batch of Alice Medrich brownie batter for this recipe. I've included the half-recipe for her unsweetened chocolate, "new classic" brownies.

    Black Bottom Pecan Praline Bars
    adapted from Alice Medrich's Bittersweet

    Brownie Layer
    2 oz unsweetened chocolate
    4 tbsp unsalted butter
    1/2 cup + 1 tbsp sugar
    1/2 tsp vanilla extract
    1/8 tsp salt
    1 cold large egg
    1/4 cup all purpose flour

    Place the chocolate and butter in a medium heatproof bowl set in a wide skillet of barely simmering water. Stir frequently until the chocolate is melted and the mixture is smooth. Remove the bowl from the skillet. Stir in the sugar, vanilla, and salt with a wooden spoon. Add the egg. Stir in the flour and beat with a wooden spoon until the batter is smooth, glossy, and beginning to come away from the sides of the bowl, 1-2 minutes. Proceed with the rest of the recipe.

    Praline Layer
    ¼ cup all-purpose flour
    ¼ tsp Baking soda
    4 tbsp unsalted butter, melted
    ¼ cup plus 2 tbsp packed brown sugar
    ¼ tsp salt
    1 large egg yolk
    ½ tsp vanilla extract
    1 ¼ cups coarsely chopped pecans or walnuts
    9-inch square baking pan

    Position a rack in the lower third of the oven and preheat the oven to 350°F. Line the bottom and sides of the baking pan with parchment paper or foil, leaving an overhang on two opposite sides.
    Spread the brownie batter in a thin even layer in the bottom of the lined pan. Set aside.
    Mix the flour and baking soda together thoroughly and set aside.
    Combine the melted butter, sugar, and salt in a medium bowl. Stir in the egg yolk and vanilla, then the flour mixture, and finally the nuts. Drop spoonfuls all over the top of the brownie batter (they will spread and cover the brownies entirely during baking).
    Bake until the edges of the topping are well browned and cracked, 20 to 25 minutes. Let cool completey in pan on a rack.
    Lift up the ends of the parchment or foil liner, and transfer the brownies to a cutting board. Cut into 25 bars.

    Tuesday, September 16, 2008

    Cream Scones with Chocolate Chunks

    Cream and Chocolate Scones

    Cream and Chocolate Scones
    Getting ready to bake

    Cream and Chocolate Scones
    Cooling down

    If I spent a lot of time thinking about scones, i'd probably write a very long post that explained their many varieties and textures, and the technique needed to make them moist and flaky instead of dry and dense. The truth is, scones aren't my favorite pastries, and in most cases I prefer buying them to making them (I'm particularly fond of the scones from Enrico Biscotti and Jin Patisserie).

    Generally, I will bake anything if I have the ingredients, regardless of whether or not I want to eat it. I chose this Alice Medrich recipe because I needed to use up some chocolate and cream. When I sampled one of the finished scones, I was surprised to find that I loved it. I loved the sweet, subtle taste of the cream and the dark contrast of the bittersweet chocolate. It had crispy edges and a moist interior.

    Maybe I should give scone recipes some more thought.

    Cream Scones with Chocolate Chunks
    adapted from Alice Medrich's Bittersweet

    2 cups all purpose flour
    1/4 cup sugar, plus sugar for sprinkling
    2 1/2 tsp baking powder
    1/2 tsp salt
    3 to 4 oz bittersweet or semisweet chocolate, coarsely chopped
    1 1/4 cups heavy cream
    1 tbsp milk or cream for brushing the tops

    Position a rack in the center of the oven and preheat to 425F. Line a baking sheet with a double layer of parchment paper.

    In a large bowl, whisk the flour, sugar, baking powder, and salt together thoroughly. Stir in the chopped chocolate. Make a well in the center and pour the cream into it. Use a rubber spatula to push the dry ingredients from the sides of the bowl into the well, cutting and turning the mixture just until the dry ingredients are almost entirely moistened and the dough looks rough and shaggy. Gather the dough into a lump and knead it gently against the sides of the bowl five or more times, pressing in the loose pieces, until the dough just holds together (it should not be smooth) and the sides of the bowl are fairly clean.

    On a lightly floured surface, pat the dough into an 8.5 inch round about 3/4 inches thick. Cut into 12 wedges. Place them at least 1 inch apart on the lined baking sheet. Brush the tops with cream or milk and sprinkle lightly with sugar.

    Bake until the tops are golden brown, 12-15 minutes. Let cool on a rack, and serve warm or at room temperature.

    Sunday, September 14, 2008

    Maple Cornmeal Drop Biscuits

    Maple Cornmeal Drop Biscuits

    These buttery, crispy-edged biscuits were pleasant on a rainy Friday morning. They're not the most exciting treats in Baking From my Home to Yours, but they're ridiculously easy to make. I think they'd be nice with bacon and eggs.

    Now I have some completely unrelated things to mention:

    1) I've had some really good food in Pittsburgh lately.
    This could be somewhat subjective, but i've enjoyed big slices of pizza from Pizza Sola, shish kebab dinners at Istanbul Grille, cinnamon twists and almond mele next door to La Prima, honeycrisp apples from the farmer's market, and interesting baked goods from Dozen Bakeshop. Dozen had some especially good pumpkin muffins last week.

    2) I'm planning a trip to Paris for the end of October.
    I'm in the initial stages of planning, but I am pretty sure this will happen. I am ridiculously excited. I've been gathering all my notes/bookmarks on pastry places i'd like to see, and i'm trying to figure out who I know in the city who'd be willing to hang out for an afternoon.

    I'm feeling settled into the new apartment too, although I think I need an oven thermometer. I've already over-baked three batches of brownies. I'm going to ease up on the baking this week- I waiting for the library to fill some of my cookbook requests. I'm curious to try Nick Malgieri's new book. It has an intriguing recipe for cheater puff pastry.

    Maple Cornmeal Drop Biscuits
    adapted from Dorie Greenspan's Baking From my Home to Yours

    1 c all-purpose flour
    1 c cornmeal
    1 T baking powder
    1/2 t salt
    1/4 t baking soda
    6 T cold unsalted butter
    1/2 c milk
    1/4 pure maple syrup

    1. Mix the dry ingredients in a medium sized bowl.
    2. Rub butter into the flour mixture with fingers or pastry blender, until butter is in various sizes from pea- to oatmeal flake-size pieces.
    3. Add the milk and maple syrup and mix just until dry ingredients are wet. Drop by spoonfuls onto parchment paper-lined baking sheet and bake for about 15 minutes at 425 degrees.

    Saturday, September 13, 2008

    Brownies and Mocha Slices

    Mocha Slices and Brownies

    These days, most of my baking happens in the morning. I take morning photos on the windowsill because it's the only place that gets enough light.

    I tried two chocolate recipes because the kitchen is well-stocked with several types of cocoa and chocolate. I went a little overboard in the Strip District last week...

    I liked the brownies; they were fudgy without that undercooked, greasy texture that comes with too much butter fat. I ate my them plain, but you can do fancy things with them. The recipe is from A Passion for Ice Cream. Anita at Dessert First has tried some of the recipes- she takes great photos.

    The mocha slices are an old favorite that I put in my Christmas cookie box a few years ago. The espresso powder, cocoa nibs and cinnamon give the cookies a dark, fruity flavor that pairs nicely with the cocoa. They're relatively soft and chewy. The original recipe coats the dough-logs with sparkling sugar, but I usually omit it. It also suggests storing the logs in a paper towel roll to hold their shape, which I never do.

    I definitely ate my fair share of brownies, but now I'm tiring of chocolate. We'll see what I end up cooking next week.

    Brownies
    adapted from Emily Luchetti's A Passion for Ice Cream

    8 ounces bittersweet chocolate, finely chopped
    1 ounce unsweetened chocolate, finely chopped
    5 ounces (10 tablespoons) unsalted butter
    3 large eggs
    1 1/4 cups sugar
    1/2 cup all-purpose flour
    1/8 teaspoon kosher salt
    1/2 teaspoon baking powder
    3 tablespoons unsweetened cocoa powder (I used dutch-process, which worked well.)

    To make the brownies: Preheat the oven to 350°F. Grease the bottom of a 9-by-13-inch baking pan and line it with parchment paper. Melt the chocolates and butter in a double boiler over hot water. In a medium bowl, whisk together the eggs and sugar. Whisk in the melted chocolate mixture. Sift together and then stir in the flour, salt, baking powder, and cocoa powder. Spread the batter in the prepared pan.

    Bake until a skewer inserted in the center, comes out fudgy and not dry, about 20 minutes. Let cool to room temperature. Run a knife around the inside edge of the pan. Place a cutting board on top of the pan. Invert the pan and board. Remove the pan and carefully peel off the parchment paper. Cut and serve.

    Mocha Slices
    adapted from Martha Stewart Magazine
    Makes about 4 dozen

    1 1/2 cups all-purpose flour, plus more for work surface
    3/4 cup unsweetened Dutch-process cocoa powder
    1/4 teaspoon salt
    2 tablespoons instant espresso powder
    1/4 teaspoon ground cinnamon
    1 1/2 sticks unsalted butter, softened
    1 cup granulated sugar
    1 large egg
    1 teaspoon pure vanilla extract
    1/2 cup cocoa nibs
    Coarse sanding sugar

    Sift together flour, cocoa, salt, espresso powder, and cinnamon into a large bowl; set aside. Put butter and sugar into the bowl of an electric mixer fitted with the paddle; mix on medium until pale and fluffy. Mix in egg and vanilla. Reduce speed to low. Add flour mixture; mix until just combined. Stir in cocoa nibs.

    Turn out dough onto a lightly floured surface; roll into a 2-inch-diameter log (I suggest dividing the dough and making 2 logs- much easier to manage.) Wrap in parchment; transfer to a paper towel tube to hold shape. Refrigerate until firm, at least 1 hour or up to overnight.

    Preheat oven to 350 degrees. Unwrap log, and let soften slightly at room temperature, about 5 minutes. Brush with water, then roll in sanding sugar. Cut log into 1/4-inchthick rounds. Space 1 inch apart on baking sheets lined with parchment paper.
    Bake until centers are set, about 10 minutes. Transfer to wire racks; cool completely. Store in airtight containers at room temperature up to 2 days.

    Wednesday, September 10, 2008

    Cocoa Nib and Hazelnut Florentines

    florentines_8099

    Cocoa Nib Hazelnut Florentines

    It's been about a week since i've posted anything here. It's not that I haven't been baking- I made lemon bars, brownies, coconut chocolate chip cookies, mocha slices, and one or two other things. Unfortunately, most of these recipes turned out to be duds.

    The brownie tart from Maxine Clark's Tarts: Sweet and Savory was too sweet and weakly flavored. 4 ounces of 72% chocolate was not enough to cut the 2 cups of sugar and 14 tbsp of butter. The brownies did have an interesting texture though.

    The tangy lemon squares from The Weekend Baker tasted good, but they were extremely difficult to serve neatly. The smooth lemon curd topping tasted great, but it was messy and the shortbread crust got a little soggy. Since they were hard to handle, I ate them with a fork. I might try the recipe again with some modifications.

    The chocolate chip coconut cookies from Pichet Ong's The Sweet Spot didn't spread much in the oven and had a weird texture. I probably over-measured the flour, but i'm wondering if other bakers have had problems following the weight measurements in this book. It's not the first time i've had weird results.

    I think the bad baking and photography mojo is some combination of stress, personal error, and recipe troubles. After all of these frustrating attempts, I decided to make a recipe that always turns out well.

    I've posted these florentines on the blog before, but I didn't include the recipe. They are thin, crunchy and elegant. They do spread a lot in the oven, so I suggest erring on the smaller side of 1 tsp while measuring the batter. Keep an eye on the baking time too, as these cookies quickly go from perfect to burnt.

    Cocoa Nib Florentines
    adapted from Emily Luchetti's A Passion for Ice Cream

    2 oz (4 tbsp) unsalted butter
    1/4 cup heavy (whipping) cream
    6 tbsp sugar
    2 tbsp + 3/4 tsp all purpose flour
    1/3 cup (1.5 oz) pistachios (or other nuts), toasted, skinned, and chopped
    1/2 cup cocoa nibs

    Preheat the oven to 350F. Line 3 baking sheets with parchment paper. Melt the butter in a saucepan over medium heat. Add the cream, sugar, flour, the 1/3 cup nuts, and the cocoa nibs. Cook the mixture over medium-low heat, stirring constantly, until it thickens and comes clean from the bottom of the pan as you stir, about 3 minutes. Remove the pan from the heat.

    Drop teaspoonsuls of the batter 3.5 inches apart on the prepared pans. The cookies will spread as they bake. Bake until golden brown, about 10 minutes. Let the cookies cool to room temperature on the pans and then remove them with a metal spatula.